• Ajuste de Curvas por Zonas


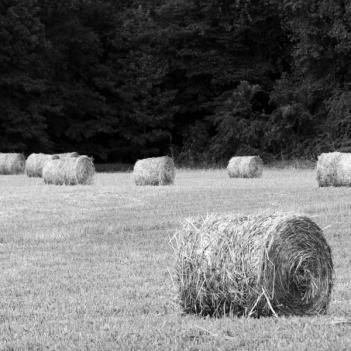
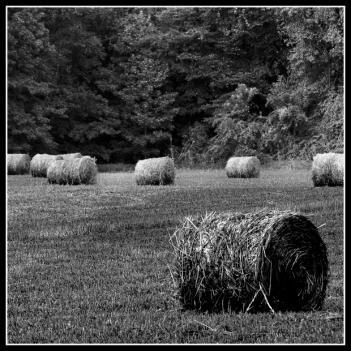
    Para explicar esta técnica voy a emplear una bonita fotografía titulada Hay harvest, Two, de mi amigo uruguayo Luis Andrade.

    Este es el resultado final del retoque digital:

    In order to explain this technique I will use a photograph titled Hay harvest, Two taken by my Uruguayan friend Luis Andrade.

    This is the final result of the digital retouch:

    Ajuste de Curvas por Zonas - realizado por jgarcía 2006 -

    En la fotografía original podemos detectar una falta de contraste y una gran diferencia entre la subexposición del fondo (en el que casi no se distinguen los árboles) y la iluminación de los primeros planos.

    In the original photograph we notice a lack of contrast and a great difference between the underexposure of the background (in which the trees can hardly be identified) and the illumination of the foreground.

    Hay Harvest Two de Luís Andrade © 2006

    En la era analógica, cuando el Cuarto Oscuro era el centro del Postprocesado, para obtener copias con una exposición ideal en escenarios con grandes diferencias de luz, durante el positivado con la ampliadora se usaban cartulinas (máscaras) para tapar parcialmente el papel fotográfico durante parte del tiempo de exposición. De esa manera se hacía antes…

    Ahora disponemos del Cuarto Oscuro digital: PhotoShop más una casi infinita lista de recursos software.

    In the analogue era, when the dark room was the centre of post processing, to obtain copies with an ideal exposition from scenes with large differences in lighting, during the printing process using the amplifier, cards (masks) were used to partially cover the photographic paper for some of the exposition time. This is how it was done before…

    Nowadays we have at our disposal the digital dark room: PhotoShop plus an almost endless list of software resources.

    Hoy voy a intentar explicaros como se puede aplicar un Ajuste de Curvas por Zonas:

    1.- Abrimos la imagen a retocar.
    2.- Con la herramiente Lazo seleccionamos una de las zonas a ajustar, por ejemplo la parte inferior de la imagen (paja y pacas).
    3.- Aplicamos un calado. Selección/Calar… (Selection/Feather). Para estas imágenes pequeñas podemos aplicar un calado de radio 20 px. A mayor tamaño de la imagen, mayor calado.
    4.- Duplicamos la zona seleccionada haciendo uso del método abreviado Ctrol+J, a la que llamaremos Zona Inferior.
    5.- Aplicamos ajuste de curvas para optimizar la parte inferior de la imagen, para ello accederemos a Imagen/Ajustes/Curvas.
    6.- Seleccionamos la capa del fondo en la Paleta Capas.
    7.- Seleccionamos la parte superior de la imagen con la herramienta Lazo.
    8.- Aplicamos un calado. Selección/Calar… (Selection/Feather) Radio 20px.
    9.- Duplicamos la zona seleccionada haciendo uso del método abreviado Ctrol+J, a la que llamaremos Zona Superior.
    10.- Aplicamos ajuste de curvas para optimizar la parte superior de la imagen, para ello accederemos a Imagen/Ajustes/Curvas.
    11.- Capa/Combinar Imagen.

    Here I will try to explain how to apply a Curve Adjustment by Zones:

    1.- Open the image to be retouched.
    2.- With the Lasso tool select one of the areas to be treated, for example the lower part of the image (straw and bales).
    3.- Apply some feathering. Selection/Feather. For small images like this one we can apply a feather radius of 20px. The bigger the image the larger the feathering.
    4.- Duplicate the selected area using Ctrl+J which we will call Lower Area.
    5.- Apply a curve adjustment to optimize the lower part of the image. Image/Settings/Curves.
    6.- Select the background layer in the Palette Layers.
    7.- Select the upper part of the image with the Lassoo tool.
    8.- Apply some feathering. Selection/Feather. Radius 20px.
    9.- Duplicate the selected area using Ctrl+J which we will call Upper Area.
    10.- Apply a curve adjustment to optimize the upper area of the image. Image/Settings/Curves.
    11.- Layer/Merge Image.
  • Amanecer de ÁngelCF


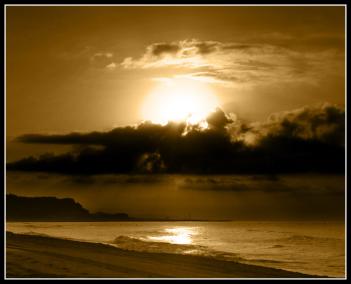
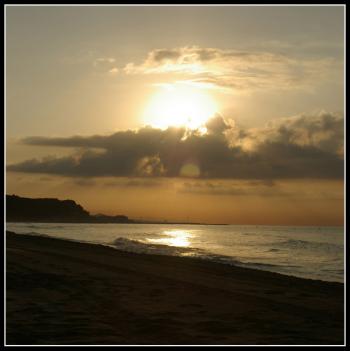
    ÁngelCF nos envía un bello atardecer para que la analicemos en la sección Fotoclínica. Tras eliminar el efecto flare, contrastar la imagen con un ajuste de curvas por zonas, nivelar el horizonte, reecuadrar para descentrar el horizonte verticalmente y aplicar un virado a sepia obtuvimos esta imagen:

    ÁngelCF has sent us this beautiful sunset to be analyzed in Photoclinic. This image was achieved after eliminating the flare effect, contrasting the image with a curve adjustment by areas, levelling out the horizon, reframing in order to decentre the horizon vertically and applying a sepia tone.

    Amanecer retocado por jgarcía

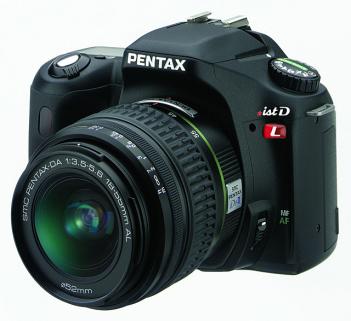
    La fotografía original fue obtenida con una Pentax *ist DL:

    The original photograph was obtained with a Pentax *ist DL:

    Pentax *ist DL

    Amanecer de Ángel

    Camara Pentax *ist DL
    Abertura f9.5
    Velocidad 1/1000sg
    Longitud focal 40mm
    ISO 200

  • Shadow de Christer Rønning Austad


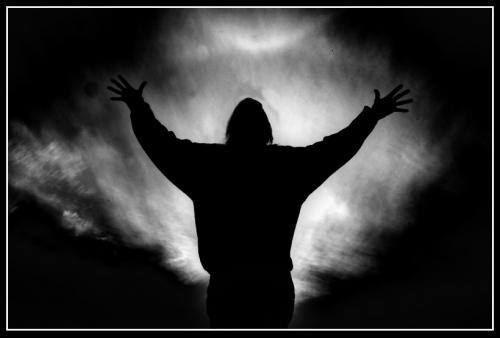
    En esta ocasión, para la sección Fotoclínica hemos utilizado una fotografía que captó el noruego Christer Rønning Austad a su novia frente al sol.

    Tan sólo apliqué una rotación a la cabeza para eliminar esa leve inclinación hacia la derecha y luego un ajuste de curvas para aportar mayor protagonismo a la silueta.

    Una composición simétrica con las manos en dos de los puntos clave de la Regla de los Tercios es una de las razones de que esta imagen sea atractiva visualmente.

    On this occasion photclinic looks at a photo taken by Norwegian Christer Rønning Austad of his girlfriend with the sun behind her.

    I applied a simple rotation of the head to correct the slight inclination to the right and then a curve adjustment to give more emphasis to the silhouette.

    A symmetric composition with the hands positioned at two of the key points of the rule of thirds

    is one reason why this image is visually attractive.

    Shadow retocada por jgarcía

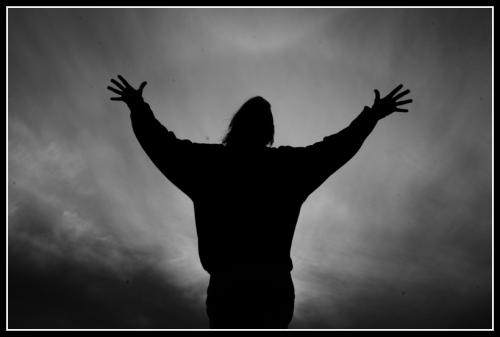
    La fotografía original de Christer:

    The original photo of Christer:

    Shadow de Christer Rønning Austad

    Cámara Canon 350D
    Abertura f29
    Velocidad 1/60sg
    Longitud focal 30mm
    Compensación exposición -2
    ISO 100

  • Paisajes Dramáticos


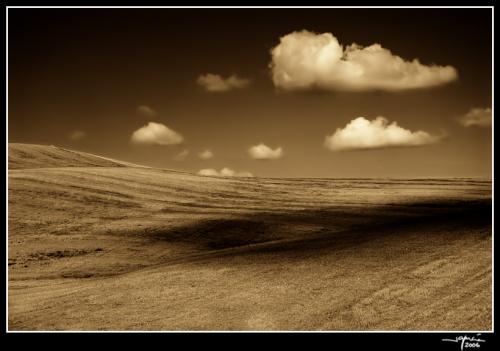
    En muchas ocasiones me han preguntado por la técnica digital que empleo para aportar dramatismo a mis paisajes.

    Esta toma la realicé muy cerca de Fernán Nuñez (Córdoba – España -) una tarde de agosto.

    Many times I have been asked about the technique I use to make my landscapes more dramatic.

    This shot was taken very close to Fernán Nuñez (Córdoba – Spain) one afternoon in August.

    Cerro con nubes - jgarcía © 2006 -

    Cámara Nikon D200
    Abertura f6.3
    Velocidad 1/1000sg
    Longitud focal 55mm
    ISO 100

    (más…)

  • Gato del Tiempo


    Algunos lo recordarán…

    Se trata de un gato que se vendío en los 60 y 70 y que cambiaba de color prediciendo el tiempo atmosférico. Uno de esos trastos que curiosamente se convertían en éxitos de ventas sin saber muy bien por qué. De aquella época también es el famoso perro que movía su cabeza y que muchos españoles llevaban en la parte trasera del coche… ahora lo que se lleva es el muñeco del Neng, o la Rana Loca…

    Podemos comprobar que el proceso evolutivo es lento, muy lento.

    Some of you may remember…

    This is a cat which was on sale in the 60s and 70s and which changed colour so forecasting the weather. One of those things which curiously became a hit without anyone really knowing why. Also from that time is the famous dog which nodded its head and which many Spaniards placed in the rear of their car… now it’s typical to have the toy Neng, or the crazy frog…

    We can see that the evolutionary process is slow, very slow.

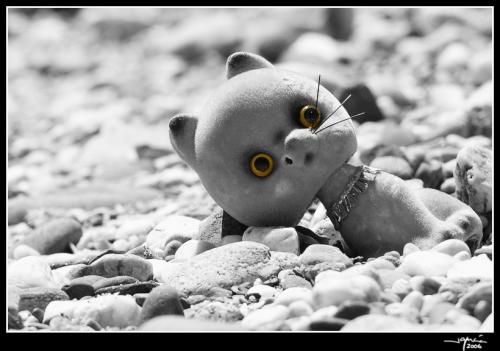
    Gato del Tiempo - jgarcía © 2006 -

    Durante el postprocesado le apliqué una desaturación selectiva para centrar la mirada del espectador en los ojos del gato.

    During post processing I applied a selective desaturation so as to centre the view on the eyes of the cat.

    Cámara Nikon D200
    Abertura f14
    Velocidad 1/200sg
    Longitud focal 220mm
    ISO 100

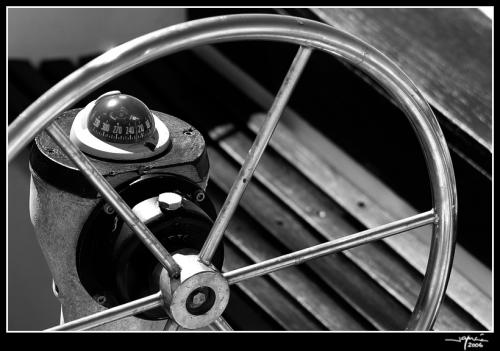
  • Timón


    Un cambio de timón a tiempo,
    fijando un nuevo rumbo,
    que nos lleve a buen puerto.

    An opportune change of bearing,
    fixing a new course,
    taking us to a safe port.

    Timón - jgarcía © 2006 -

    Durante el postprocesado la pasé a blanco y negro utilizando la acción Ilford Delta 400 Pro & 3200.

    During post processing I converted the photograph to black and white using the Ilford Delta 400 Pro & 3200 action.

    Cámara Nikon D200
    Abertura f7.1
    Velocidad 1/1000sg
    Longitud focal 116mm
    ISO 100


Web · Vídeos · Libros · Autor

Está estrictamente prohibida la reproducción, parcial o total de los contenidos de esta web, sin el acuerdo previo por escrito del autor.

García-Gálvez © 2005-2020