El Blog

×××
  • Quitar Ojeras


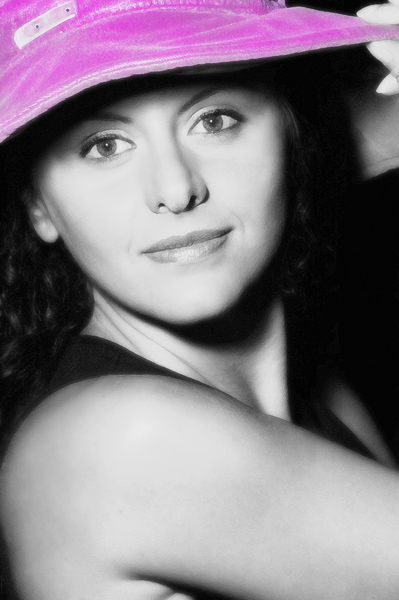
    Para mejorar un retrato podemos utilizar muchas técnicas como ya expusimos en:

    1. Mejorando un retrato.
    2. Mejorando un retrato 2.
    3. Mejorando un retrato 3.
    4. Mejorando un retrato 4.
    5. Mejorando un retrato 5.
    6. Mejorando un retrato 6.
    7. Mejorando un retrato 7.

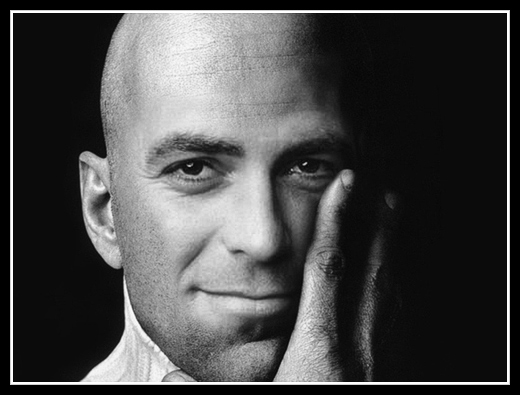
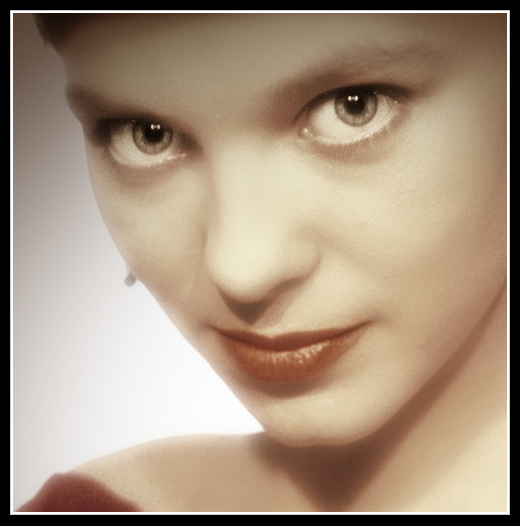
    Un retoque interesante es el que permite eliminar o suavizar las ojeras en los retratos. Para estos casos utilizo la Herramienta Tampón de Clonar en el modo Aclarar con un pincel suave, al 25% de Opacidad.

    In order to improve a portrait we can use many techniques as already explained in:

    1. Improving a portrait.
    2. Improving a portrait 2.
    3. Improving a portrait 3.
    4. Improving a portrait 4.
    5. Improving a portrait 5.
    6. Improving a portrait 6.
    7. Improving a portrait 7.

    An interesting retouch is one which allows us to eliminate or soften the eye bags in our portraits. In these cases I use the clone stamp tool in light mode with a soft brush at 25% opacity.

    Este es el resultado obtenido con este método:

    This is the result obtained using this method:

    Sin Ojeras por jgarcía © 2006

    La fotografía original:

    The original photograph:

    Fotografía original
    María Pilar Guerrero ha montado este video tutorial en el que muestra como se pueden eliminar las ojeras utilizando las herramientas Parche y Pincel Corrector.

    María Pilar Guerrero has put together this video tutorial in which she shows us how to eliminate eye bags using the patch and brush corrector tools.
  • Video de Caras&Vistas


    Hace tiempo publiqué el artículo Inauguración de la Exposición Fotográfica de Gran Formato Caras&Vistas haciéndome eco de mi última muestra fotográfica.

    Sometime ago I Published an article titled “Inauguration of the Large Format Photography Exposition Caras&Vistas” echoing my last photographic presentation.

    Sandra - jgarcía © 2006 -

    Durante la inauguración se proyectó una presentación multimedia. La he subido a youtube para que aquellos que no asistieron a su estreno puedan verla ahora.

    During the inauguration a multimedia presentation was shown. I have uploaded this presentation to YouTube so that those that could not attend can now see it.
  • Combinar Rostros


    Para mezclar dos retratos podemos utilizar el siguiente retoque:

    1.- Abrimos los dos retratos que llamaremos imagen A y B.
    2.- Crear una nueva capa bajo la imagen A.
    3.- Seleccionamos con la herramienta Lazo el contorno de la cara.
    4.- Selección/Calado a 2-5px
    5.- Suprimir el area seleccionada pulsando la tecla Supr.
    6.- Deseleccionamos (Ctrol+D)
    7.- Copiar la imagen B(Ctrol+A y Ctrol+C).
    8.- Pegar la imagen B bajo la capa de la imagen A (en la capa creada en el paso 2).
    9.- Desplazar capa hasta posición óptima.

    En este caso he encajado el rostro de George Clooney en la cara de Bruce Willis.

    In order to mix two portraits we can use the following retouch:

    1. Open the two portraits which we will call image A and B.
    2. Create a new layer under image A.
    3. Select with the lasso tool the outline of the face.
    4. Selection/Feathered at 2-5 px.
    5. Delete the selected area pressing the Del key.
    6. Deselect (Ctrl+D)
    7. Copy image B (Ctrl+A and Ctrl+C).
    8. Paste image B to the layer under image A. (the layer created in step 2)
    9. Displace the layer to the optimal position.

    In this case I have inserted the face of George Clooney where Bruce Willis’s should be.

    Willis + Clooney por jgarcía 2006

    Luis Almeida ha montado este videotutorial en el que explica como aplicar este retoque digital.

    Luis Almeida has created this videotutorial in which he explains how to apply this digital retouch.
  • Sustituir Fondos


    Para sustituir el fondo de un retrato podemos utilizar el siguiente método:

    1. Abrir fotografía con PhotoShop.
    2. Duplicar Capa (Ctrol+J)
    3. Filtro/Extraer
    4. Definimos la silueta que deseamos extraer.
    5. Con la herramienta de Relleno (Cubeta) señalamos en el interior del área a extraer.
    6. Previsualizamos
    7. Perfeccionamos la silueta.
    8. Aceptamos la extracción.
    9. Seleccionamos la capa del fondo.
    10. Creamos una nueva capa
    11. Copiamos (Ctrol+C) y pegamos(Ctrol+V) el nuevo fondo en la capa creada en el paso anterior.
    12. Adaptamos el tamaño del fondo (Edición/Transformar/Distorsionar).
    13. Aplicamos un desenfoque gaussiano al fondo (Filtro/Desenfoque/Desenfoque Gaussiano).
    To substitute the background of a portrait we can use the following method:

    1. Open the photograph in PhotoShop.
    2. Duplicate layer.
    3. Filter/Extract.
    4. Define the silhouette we want to extract.
    5. Indicate the area to be extracted with the fill tool.
    6. Pre-visualize.
    7. Perfect the silhouette.
    8. Accept the extraction.
    9. Select the background layer.
    10. Create a new layer.
    11. Copy (Ctrl+C) and Paste (Ctrl+V) the new background to the layer created in the previous step.
    12. Adapt the size of the background (Edit/Transform/Distort).
    13. Apply a Gaussian blur to the background (Filter/Blur/Gaussian blur).

    Resultado Final por jgarcía 2006

    He creado este breve videotutorial (3 minutos 26 segundos) que os puede ayudar a aprender esta técnica para extraer sujetos de las imágenes.

    I have made this brief videotutorial (3 minutes 26 seconds) which may help you to learn this technique of extracting subjects from images.
  • Maquillaje Digital


    Hace tiempo que publiqué el artículo Filtro Glamour, en el que explicaba como se podían dulcificar la piel de los rostros de nuestros retratos. Ahora de la mano de Luis Almeida podemos aprender otra manera de aplicar un filtro que suavice la piel de nuestros modelos.

    Some time ago I published the article Glamour Filter in which I explained how to soften the faces in our portraits. Now, thanks to Luis Almeida we can learn another way of applying a filter to soften the skin of our models.
  • Blanquear Dientes


    Yo uso este método para blanquear los dientes en los retratos:

    1. Abrir la foto a corregir.
    2. Seleccionar la herramienta Lazo y seleccionamos los dientes con cuidado de no afectar a la encía.
    3. Seleccionamos en el menú desplegable Selección/Calar. Introducimos 1 píxel y OK.
    4. Imagen/Ajustes/Tono-saturación. Seleccionamos Amarillos del cuadro combinado Edición y disminuimos la cantidad de Saturación.
    5. En el mismo cuadro de diálogo (Tono-saturación), en el cuadro de combinado Edición seleccionamos Todos y aumentamos la Luminosidad para aumentar el brillo. Pulsamos Ctrl+D para deseleccionar la selección.

    Luis Almeida ha montado este videotutorial en el que explica otro método para blanquear los dientes. Muy fácil de aplicar y con buenos resultados.

    I use this method to whiten teeth in portraits:

    1. Open the photo to be corrected.
    2. Select the Lasso Tool and select the teeth with careful attention not to affect the gums.
    3. Select from the drop down menu Selection/Feather. Introduce 1 pixel and OK.
    4. Image/Settings/Tone-saturation. Select Yellows from the Edition combo box and reduce the level of Saturation.
    5. In the same dialog box (Tone-saturation), from the Edition combo box select All and increase the luminosity to increase the shine. Press Ctrl+D to deselect the selection.

    Luis Almeida has edited this video tutorial in which he explains another method to whiten teeth. It is very easy to carry out and gives good results.

  • La Manzana de Adán


    En el Jardín del Edén estaba prohibido comer el fruto del árbol de la ciencia del bien y del mal… interpretaciones antropológicas o psicoanalíticas del texto bíblico sostienen que el pecado de Adán y Eva es una alegoría del sexo. Otra vez el sexo.

    In the Garden of Eden it was forbidden to eat the fruit of the tree of the knowledge of good and evil… anthropological and psychoanalytical interpretations of the biblical text maintain that the sin of Adam and Eve is an allegory of sex. Once again sex.


    La Manzana de Adán - jgarcía © 2006 -

    Se trata de una fotocomposición con dos capas: el cielo y la manzana.

    This is a photocomposition of two layers: the sky and the apple.
  • Líneas Rectas


    Las líneas dominantes son un recurso que se utiliza con mucha frecuencia para construir imágenes cautivadoras porque guían la vista del espectador hacia el interior de la imagen, conduciéndole hasta el punto de interes.

    El mundo real nos ofrece todo tipo de líneas dominantes: rios, montañas, árboles, huellas en la arena, surcos de un campo preparado para la siembra, edificios, puentes, productos en un mercado… sólo hay que buscarlos, encuadrar y disparar para que formen parte de nuestro archivo fotográfico.

    Dominant lines are much used to construct captivating images as they guide the view to the interior of the image, to the point of interest.

    The real world offers many types of dominant lines: rivers, mountains, trees, prints in sand, furrows in a field ready for sowing, buildings, bridges, products in a market… we only have to look for them, frame and shoot to make them part of our photographic archive.

    Brazo de un sofá.


    Líneas 1

    Fibra óptica.


    Líneas 2

    Hoja de una palmera.


    Líneas 3

  • Campos de Molinos 2


    Estoy seguro que El Ingenioso Hidalgo de Don Quijote de la Mancha habría entrado en batalla al encontrarse con un panorama como el que pude disfrutar aquella tarde de junio en Tarifa. Tierra en la que Alonso Quijano habría terminado de enloquecer con aquellos «gigantes».

    I’m sure that The Ingenious Gentleman Don Quixote of la Mancha would have entered into battle upon seeing the panorama I had the pleasure of viewing one June afternoon in Tarifa (Cadiz – Spain -). A land in which Alonso Quijano would have been driven crazy by the “giants”.


    Campos de Molinos 2 - jgarcía © 2006 -

    Cámara Nikon D200
    Trípode
    Filtro polarizador
    Abertura f25
    Velocidad 1/5sg
    Longitud focal 70mm
    ISO 100

  • Campos de Molinos


    Además del perfecto oleaje y viento para los los surfers, en Tarifa podemos encontrar 9 parques de energía eólica:

    As well as the perfect swell and wind for the surfers, in Tarifa (Cadiz, Spain) 9 wind farms can be found:
    1. Tarifa-1MW
    2. Monte Ahumada – 3MW
    3. Seasa (Pesur – E3) – 30 MW
    4. Levantera
    5. La Joya, PE Europea – 6MW
    6. El Cabrito – 30 MW
    7. Tahivilla – 30 MW
    8. Los Lances – 10MW
    9. Wind Ibérica España – 1MW


    Campos de Molinos - jgarcía © 2006 -

    Cámara Nikon D200
    Abertura f5
    Velocidad 1/200sg
    Longitud focal 70mm
    ISO 100


Web · Vídeos · Libros · Autor

Está estrictamente prohibida la reproducción, parcial o total de los contenidos de esta web, sin el acuerdo previo por escrito del autor.

García-Gálvez © 2005-2020